| Site Notice |
|---|
| Due to recent vandalism, all edits performed by IPs and new users will be reviewed before being published. This means it might take some time for your edit to show up. New accounts also have to be confirmed before being created. If you have any questions, contact one of the staff members on their talk page, or on the Discord server. |
Quest 311: To the Underworld Pt. 1: Difference between revisions
Jump to navigation
Jump to search
Adding categories |
No edit summary |
||
| Line 1: | Line 1: | ||
{{InfoMissionKHUX | |||
|number=311 | |||
|nadesc=To the Underworld Pt. 1 | |||
|jpdesc= | |||
|kana= | |||
|romaji= | |||
|world=Olympus Coliseum | |||
|room1=Underworld Entrance | |||
|ap=15 | |||
|lvl=102 | |||
|raid=Savage Spider | |||
|target=Armored Knight | |||
|att=Power | |||
|naobj1=Defeat all enemies within 1 turn | |||
|naobjbonus1=Avatar Coin | |||
|naobjbonus1qty=6 | |||
|naobj2=Equip the Three Wishes keyblade | |||
|naobjbonus2=Avatar Coin | |||
|naobjbonus2qty=4 | |||
|naobj3=Defeat Wyvern x 1 | |||
|naobjbonus3=Mythril Shard | |||
|naobjbonus3qty=1 | |||
|jpobj1=Defeat all enemies within 1 turn | |||
|jpobjbonus1=Avatar Coin | |||
|jpobjbonus1qty=5 | |||
|jpobj2=Equip the Three Wishes keyblade | |||
|jpobjbonus2=Avatar Coin | |||
|jpobjbonus2qty=5 | |||
|jpobj3=Defeat Wyvern x 1 | |||
|jpobjbonus3=Mythril Shard | |||
|jpobjbonus3qty=1 | |||
|naquest=None | |||
|jpquest=None | |||
|mat1=Gold Ore | |||
|mat2=Iron Ore | |||
|mat3=Silver Ore | |||
|mat4=Copper Ore | |||
|mat5=Netherstone | |||
|mat6=Netherflame | |||
}} | |||
==Story== | |||
{| class="wikitable collapsible collapsed" width="65%" | |||
! Script | |||
|- | |||
| | |||
:{{small|[Search for Cloud in the Underworld.]}} | |||
|} | |||
==Maps== | |||
<gallery> | |||
File:Underworld Entrance KHX.png | |||
</gallery> | |||
== | ==Enemies== | ||
{|cellspacing="0" cellpadding="5" align="center" border="1" | |||
!style="background:#313DCA;"|<font color=white>Icon</font> | |||
!style="background:#313DCA;"|<font color=white>Enemies</font> | |||
!width="200" style="background:#313DCA;"|<font color=white>Locations</font> | |||
!width="200" style="background:#313DCA;"|<font color=white>Notes</font> | |||
|-style="background:#AEC5E7;" | |||
|[[File:Bad Dog KHX.png|30x30px|center|link=]] | |||
|{{e|Bad Dog|3}} | |||
|Underworld Entrance | |||
| | |||
|-style="background:#AEC5E7;" | |||
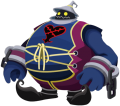
|[[File:Large Body KHX.png|30x30px|center|link=]] | |||
|{{e|Large Body|1}} | |||
|Underworld Entrance | |||
| | |||
|-style="background:#AEC5E7;" | |||
|[[File:Wyvern KHX.png|30x30px|center|link=]] | |||
|{{e|Wyvern|1}} | |||
|Underworld Entrance | |||
| | |||
|-style="background:#AEC5E7;" | |||
|[[File:Bad Dog KHX.png|30x30px|center|link=]] | |||
|{{e|Bad Dog|3}} | |||
|Underworld Entrance | |||
| | |||
|-style="background:#AEC5E7;" | |||
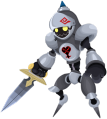
|[[File:Armored Knight KHX.png|30x30px|center|link=]] | |||
|{{tar|Armored Knight|1}}<br>{{e|Bad Dog|2}} | |||
|Underworld Entrance | |||
|Target Enemy | |||
|-style="background:#313DCA;" | |||
!colspan="4"|<font color=white>Total Heartless: 11</font> | |||
|} | |||
== | ===Enemy types=== | ||
{|class="wikitable collapsible collapsed" | |||
!Gallery | |||
|- | |||
| | |||
<gallery> | |||
File:Bad Dog KHX.png|{{e|Bad Dog}} | |||
File:Large Body KHX.png|{{e|Large Body}} | |||
File:Wyvern KHX.png|{{e|Wyvern}} | |||
File:Armored Knight KHX.png|{{e|Armored Knight}} | |||
</gallery> | |||
|} | |||
==Treasures== | |||
{|cellspacing="0" cellpadding="5" align="center" border="1" | |||
!style="background:#313DCA;"|<font color=white>Icon</font> | |||
!style="background:#313DCA;"|<font color=white>Items found</font> | |||
!width="200" style="background:#313DCA;"|<font color=white>Locations</font> | |||
!width="200" style="background:#313DCA;"|<font color=white>Notes</font> | |||
|-style="background:#AEC5E7;" | |||
|[[File:Attack Prize 1 KHX.png|30x30px|center|link=]] | |||
|[[Attack Prize]] | |||
|Coliseum Entrance | |||
|Northeast jumpable path. | |||
|-style="background:#AEC5E7;" | |||
|[[File:HP Prize 1 KHX.png|30x30px|center|link=]] | |||
|[[HP Prize]] | |||
|Coliseum Entrance | |||
|Southwest jumpable path. | |||
|} | |||
{ | {{UXMissions}} | ||
{ | |||
Revision as of 00:06, 21 June 2016
Story
| Script |
|---|
|
Maps
Enemies
| Icon | Enemies | Locations | Notes |
|---|---|---|---|
| Underworld Entrance | |||
| Underworld Entrance | |||
| Underworld Entrance | |||
| Underworld Entrance | |||
| Underworld Entrance | Target Enemy | ||
| Total Heartless: 11 | |||
Enemy types
| Gallery |
|---|
|
|
Treasures
| Icon | Items found | Locations | Notes |
|---|---|---|---|
| Attack Prize | Coliseum Entrance | Northeast jumpable path. | |
| HP Prize | Coliseum Entrance | Southwest jumpable path. |


