| Site Notice |
|---|
| Due to recent vandalism, all edits performed by IPs and new users will be reviewed before being published. This means it might take some time for your edit to show up. New accounts also have to be confirmed before being created. If you have any questions, contact one of the staff members on their talk page, or on the Discord server. |
Daybreak Town: Difference between revisions
ArtOfPeace (talk | contribs) No edit summary |
No edit summary |
||
| (14 intermediate revisions by 5 users not shown) | |||
| Line 1: | Line 1: | ||
Daybreak Town is the first world visited in | [[File:Daybreak Town Logo KHX.png|center]] | ||
{{nihongo|'''{{kh|Daybreak Town}}'''}} is the first world visited by {{Player}} in {{KHUX}}. | |||
== | ==Areas== | ||
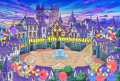
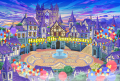
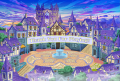
The {{nihongo|'''Fountain Square'''|噴水広場|Funsui Hiroba}} is the first area in the world and also acts the the party's hub. | |||
<gallery> | |||
Fountain Square KHX.png|Fountain Square | |||
Fountain Square (2) KHX.png|A Corridor of Darkness leading to the Dark Corridor Trials. | |||
</gallery> | |||
:During seasonal events the hub version of the Fountain Square changes its appearance. | |||
<gallery> | |||
Fountain Square (Moogle of Glory event) KHX.png|Moogle O' Glory event | |||
Daybreak Town - Fountain Square (Valentine's Day) KHX.png|Valentine's Day | |||
Daybreak Town - Fountain Square (White Day) KHX.png|White Day | |||
Daybreak Town - Fountain Square (Halloween) KHX.png|Halloween | |||
Daybreak Town - Fountain Square (Winter) KHX.png|Winter | |||
Daybreak Town - Fountain Square (Christmas) KHX.png|Before Christmas | |||
Daybreak Town - Fountain Square (Christmas) (2) KHX.png|Christmas | |||
Daybreak Town - Fountain Square (New Year) KHX.png|New Year's Eve | |||
Fountain Square (1st Anniversary) KHX.png|1st Anniversary | |||
Fountain Square (2nd Anniversary) KHX.png|2nd Anniversary | |||
Fountain Square (3rd Anniversary) KHX.png|3rd Anniversary | |||
Fountain Square (4th Anniversary) KHX.png|4th Anniversary | |||
Fountain Square (5th Anniversary) KHX.png|5th Anniversary | |||
Daybreak Town (End of service) KHX.png|End of Service | |||
</gallery> | |||
The door in the center leads to the {{nihongo|'''Moogle Shop'''|モーグリの店|Mōguri no Mise}}. | |||
<gallery> | |||
Moogle Shop KHX.png|Moogle Shop | |||
Moogle Shop (2) KHX.png|The frozen Moogle Shop during the [[Christmas Winter Party Event!]] | |||
Moogle Shop (3) KHX.png|The flooded Moogle Shop during the Shark Hunt. | |||
</gallery> | |||
Up the stairs is the {{nihongo|'''Attic'''|屋根裏部屋|Yaneuraheya}}. | |||
<gallery> | |||
Attic KHX.png|Attic | |||
Attic (2) KHX.png|The frozen Attic during the Christmas Winter Party Event! | |||
</gallery> | |||
Beyond the window lies the {{nihongo|'''Rooftop'''|噴水広場・上層|Funsui Hiroba Jōsō|lit. "Fountain Square: Upper Level"}}. | |||
<gallery> | |||
Rooftop KHX.png|Rooftop | |||
</gallery> | |||
The stairs in the lower left corner of the Fountain Square lead to the {{nihongo|'''1st District'''|1番街|1-Ban Machi|lit. "1st Avenue"}}. | |||
<gallery> | |||
1st District KHX.png|1st District | |||
</gallery> | |||
Following the stairs on the right side of the Fountain Square the {{nihongo|'''2nd District'''|2番街|2-Ban Machi|lit. "2nd Avenue"}} can be reached. | |||
<gallery> | |||
2nd District KHX.png|2nd District | |||
2nd District (2) KHX.png|The 2nd District after hitting the waterway switch. | |||
</gallery> | |||
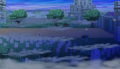
Somewhere beyond the 2nd District lies the {{nihongo|'''Clock Tower Area'''|時計塔・周辺|Tokei-tō Shūhen|lit. "Clock Tower and Surroundings"}}. | |||
<gallery> | |||
Clock Tower Area KHX.png|Clock Tower Area | |||
</gallery> | |||
Leaving through the large left gate of the Clock Tower Area leads to the {{nihongo|'''Seventh District'''|7番街|7-Ban Machi|lit. "7th Avenue"}}. | |||
<gallery> | |||
Seventh District KHX.png|Seventh District | |||
Seventh District (2) KHX.png|The Seventh District during Nightmare Chirithy's assault. | |||
</gallery> | |||
On the left side of the Seventh District is a door to the {{nihongo|'''Seventh District: Vacant House'''|7番街・空家|7-Ban Machi Akiya|lit. "7th Avenue: Vacant House"}}. | |||
<gallery> | |||
Seventh District - Vacant House KHX.png|Seventh District: Vacant House | |||
</gallery> | |||
Leaving the Fountain Square through the large gate on the left leads to {{nihongo|'''Market'''|中央市場|Chūōshijō|lit. "Central Market"}}. | |||
<gallery> | |||
Market KHX.png|Market | |||
</gallery> | |||
In the middle of the Market a door to the {{nihongo|'''Warehouse'''|中央市場・倉庫|Chūōshijō Sōko|lit. "Central Market: Warehouse"}} can be found. | |||
<gallery> | |||
Warehouse KHX.png|Warehouse | |||
</gallery> | |||
The gate on the left side of the Market connects to the {{nihongo|'''Avenue'''|郊外へ続く橋|Kōgai e Tsudzuku Hashi|lit. "Bridge to the Suburbs"}}. | |||
<gallery> | |||
Avenue KHX.png|Avenue | |||
</gallery> | |||
Crossing the bridge to the left leads to the {{nihongo|'''Boardwalk'''|海沿いの遊歩道|Umizoi no Yūhodō|lit. "Boardwalk along the Sea"}}. | |||
<gallery> | |||
Boardwalk KHX.png|Boardwalk | |||
</gallery> | |||
The Boardwalk has two exits to the {{nihongo|'''Waterfront Park'''|臨海公園|Rinkai Kōen}}: on the upper left over the bridge, and the lower left through the park. | |||
<gallery> | |||
Waterfront Park KHX.png|Waterfront Park | |||
</gallery> | |||
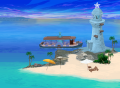
The {{nihongo|'''Waterfront Park: Office'''|臨海公園・管理人室|Rinkai Kōen Kanrininshitsu|lit. "Waterfront Park: Manager's Office"}} can be found by entering the lighthouse in the Waterfront Park. | |||
<gallery> | |||
Waterfront Park - Office KHX.png|Waterfront Park: Office | |||
</gallery> | |||
The bottom left door of the Waterfront Park: Office leads to the {{nihongo|'''Waterfront Park: Dock'''|臨海公園・船着き場|Rinkai Kōen Funatsukiba}}. | |||
<gallery> | |||
Waterfront Park - Dock KHX.png|Waterfront Park: Dock | |||
Waterfront Park - Dock (2) KHX.png|The Waterfront Park: Dock with a ferry ready to leave. | |||
</gallery> | |||
[[ | Taking the ferry from the Waterfront Park: Dock, the {{nihongo|'''Beach'''|島のビーチ|Shima no Bīchi|lit. "Island Beach"}} can be reached, which consists of four areas. A dusk and night version of Beach can be visited during the [[Summer Adventure]] event. | ||
<gallery> | |||
Beach KHX.png|Beach A | |||
Beach (2) KHX.png|Beach B | |||
Beach (3) KHX.png|Beach C | |||
Beach (4) KHX.png|Beach D | |||
</gallery> | |||
<gallery> | |||
Beach (Evening) KHX.png|Beach A at sunset | |||
Beach (Evening) (2) KHX.png|Beach B at sunset | |||
Beach (Evening) (3) KHX.png|Beach C at sunset | |||
Beach (Evening) (4) KHX.png|Beach D at sunset | |||
</gallery> | |||
<gallery> | |||
Beach (Night) KHX.png|Beach A at night | |||
Beach (Night) (2) KHX.png|Beach B at night | |||
Beach (Night) (3) KHX.png|Beach C at night | |||
Beach (Night) (4) KHX.png|Beach D at night | |||
</gallery> | |||
During the Summer Adventure event, taking a different ferry from the Beach would take you to a reef with shipwrecks. | |||
<gallery> | |||
Shipwreck Shore KHX.png|''Shipwreck Shore'' | |||
Shipwreck Shore (2) KHX.png|The ''Shipwreck Shore'' during the day. | |||
</gallery> | |||
Entering the sewers in the 2nd District or going down the steps in the Waterfront Park: Office leads to the {{nihongo|'''Underground Waterway Entrance'''|地下水路・入口|Chika Suiro Iriguchi}}, and subsequentially to the {{nihongo|'''Underground Waterway'''|地下水路|Chika Suiro}}, which connects both areas and the {{nihongo|'''Clock Tower: Underground Entrance'''|時計塔・地下入口|Tokei-tō Chika Iriguchi}}. Counting entries and exits, the Underground Waterway consists of ten areas. | |||
<gallery> | |||
Underground Waterway (9) KHX.png|Underground Waterway F | |||
Underground Waterway (8) KHX.png|Underground Waterway E | |||
Underground Waterway (5) KHX.png|Underground Waterway D | |||
Underground Waterway (3) KHX.png|Underground Waterway C | |||
Underground Waterway Entrance KHX.png|Underground Waterway Entrance | |||
Underground Waterway KHX.png|Underground Waterway A (1) | |||
Underground Waterway KHX.png|Underground Waterway A (2) | |||
Underground Waterway KHX.png|Underground Waterway A (3) | |||
Underground Waterway (2) KHX.png|Underground Waterway B | |||
File:Clock Tower - Underground Entrance KHX.png|Clock Tower: Underground Entrance | |||
</gallery> | |||
:Draining the water during the Shark Hunt creates a lower passage that connects the first four areas of the Underground Waterway. | |||
<gallery> | |||
Underground Waterway (7) KHX.png|Underground Waterway F | |||
Underground Waterway (10) KHX.png|Underground Waterway E | |||
Underground Waterway (6) KHX.png|Underground Waterway D | |||
Underground Waterway (4) KHX.png|Underground Waterway C | |||
</gallery> | |||
:During the '''Christmas Winter Party Event!''', three areas are frozen. | |||
<gallery> | |||
Underground Waterway (12) KHX.png|Underground Waterway D | |||
Underground Waterway (11) KHX.png|Underground Waterway C | |||
Underground Waterway (13) KHX.png|Underground Waterway E | |||
</gallery> | |||
Going up the stairs in the Clock Tower: Underground Entrance leads to the {{nihongo|'''Clock Tower: Level'''|時計塔内部|Tokei-tō Naibu|lit. "Clock Tower Interior"}}, which consists of a labyrinth of five different areas. | |||
<gallery> | |||
Clock Tower - Level KHX.png|Clock Tower: Level A | |||
Clock Tower - Level (2) KHX.png|Clock Tower: Level B | |||
Clock Tower - Level (3) KHX.png|Clock Tower: Level C | |||
Clock Tower - Level (4) KHX.png|Clock Tower: Level D | |||
Clock Tower - Level (5) KHX.png|Clock Tower: Level E | |||
</gallery> | |||
In some quests, exterior areas can be reached through some Clock Tower: Level exits. | |||
<gallery> | |||
Clock Tower - Exterior KHX.png|Clock Tower: Exterior A | |||
Clock Tower - Exterior (2) KHX.png|Clock Tower: Exterior B | |||
</gallery> | |||
Some areas of the the Clock Tower: Level C variant contain the {{nihongo|'''Clock Tower: Elevator'''|時計塔・エレベーター|Tokei-tō Erebētā}}. | |||
<gallery> | |||
Clock Tower - Elevator KHX.png|Clock Tower: Elevator | |||
</gallery> | |||
Moving up with the elevator leads to the {{nihongo|'''Foretellers' Chambers'''|予知者の部屋|Yochi-sha no Heya}}. | |||
<gallery> | |||
Foretellers' Chambers KHX.png|Foretellers' Chambers | |||
Foretellers' Chambers (2) KHX.png|The Foretellers' Chambers during the fight with Darkness. | |||
</gallery> | |||
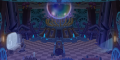
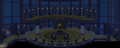
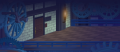
Another elevator moves up to the {{nihongo|'''Clock Tower: Control Room Hall'''|時計塔・管理室前|Tokei-tō Kanri Shitsumae|lit. "Clock Tower: In Front of the Control Room"}}. | |||
<gallery> | |||
Clock Tower - Control Room Hall KHX.png|Clock Tower: Control Room Hall | |||
</gallery> | |||
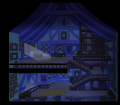
At the bottom of the Clock Tower lies {{nihongo|'''The Basement'''|箱舟の間|Hakobune no Ma|lit. "Ark Room"}}, which contains the lifeboat. | |||
<gallery> | |||
The Basement KHX.png|The Basement | |||
</gallery> | |||
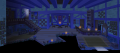
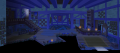
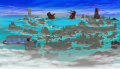
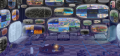
Somewhere in Daybreak Town a hall with fourteen adjoining rooms can be found. | |||
<gallery> | |||
Unknown room KHX.png|''Unknown room'' | |||
</gallery> | |||
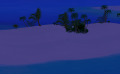
There is a graveyard somewhere beyond the city area of Daybreak Town. | |||
<gallery> | |||
Graveyard KHX.png|''Graveyard'' A | |||
Graveyard (2) KHX.png|''Graveyard'' B | |||
Graveyard (3) KHX.png|''Graveyard'' C | |||
</gallery> | |||
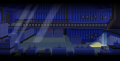
[[ | The {{nihongo|'''Corridor of Darkness'''|闇の回廊|Yami no Kairō}} can be accessed at the Fountain Square during the Dark Corridor Trials, the Warehouse when visiting [[Enchanted Dominion]] for the first time, and ''Shipwreck Shore'' during the Summer Adventure event. | ||
<gallery> | |||
Corridor of Darkness KHX.png|Corridor of Darkness A | |||
Corridor of Darkness (2) KHX.png|Corridor of Darkness B | |||
Corridor of Darkness (3) KHX.png|Corridor of Darkness C | |||
Corridor of Darkness (4) KHX.png|Corridor of Darkness D | |||
Corridor of Darkness (5) KHX.png|Corridor of Darkness E | |||
Corridor of Darkness (6) KHX.png|Corridor of Darkness F | |||
</gallery> | |||
==Cutscene maps== | |||
<gallery> | |||
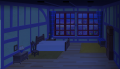
Player's Room KHX.png|{{Player}}'s room | |||
Strelitzia's Room KHX.png|Strelitzia's room | |||
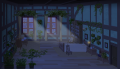
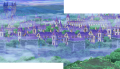
Park KHX.png|A park overlooking the town. | |||
Hills KHX.png|The hills | |||
Hills (2) KHX.png|The hills during sunset. | |||
Flower Meadow KHX.png|The flower meadow | |||
Clock Tower - Control Room KHX.png|The Control Room | |||
Clock Tower - Chamber Corridor KHX.png|The corridor before Ventus's chamber. | |||
Clock Tower - Chamber KHX.png|The chamber where Ventus was recovering. | |||
Clock Tower - Basement Corridor KHX.png|The corridor before The Basement. | |||
</gallery> | |||
[[ | [[Category:Worlds]] | ||
[[Category:Daybreak Town Quests| ]] | |||
[[Category: | |||
Latest revision as of 05:56, 9 June 2021
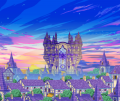
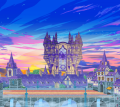
Daybreak Town is the first world visited by The Player in Kingdom Hearts Unchained χ / Union χ.
Areas
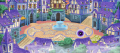
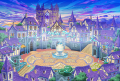
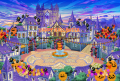
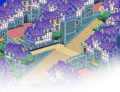
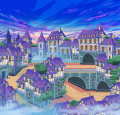
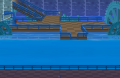
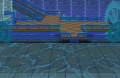
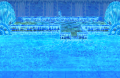
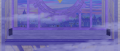
[edit]The Fountain Square (噴水広場 Funsui Hiroba) is the first area in the world and also acts the the party's hub.
-
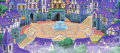 Fountain Square
 -
 A Corridor of Darkness leading to the Dark Corridor Trials.

_KHX.png)
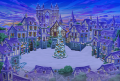
- During seasonal events the hub version of the Fountain Square changes its appearance.
-
 Moogle O' Glory event
 -
 Valentine's Day
 -
 White Day
 -
 Halloween
 -
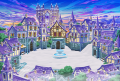 Winter
 -
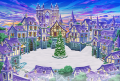 Before Christmas
 -
 Christmas
 -
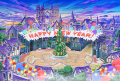 New Year's Eve
 -
 1st Anniversary
 -
 2nd Anniversary
 -
 3rd Anniversary
 -
 4th Anniversary
 -
 5th Anniversary
 -
 End of Service
_KHX.png)
_KHX.png)
_KHX.png)
_KHX.png)
_KHX.png)
_KHX.png)
_(2)_KHX.png)
_KHX.png)
_KHX.png)
_KHX.png)
_KHX.png)
_KHX.png)
_KHX.png)
_KHX.png)
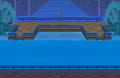
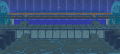
The door in the center leads to the Moogle Shop (モーグリの店 Mōguri no Mise).
-
 Moogle Shop
 -
 The frozen Moogle Shop during the Christmas Winter Party Event!
 -
 The flooded Moogle Shop during the Shark Hunt.

_KHX.png)
_KHX.png)
Up the stairs is the Attic (屋根裏部屋 Yaneuraheya).
-
 Attic
Attic -
 The frozen Attic during the Christmas Winter Party Event!

_KHX.png)
Beyond the window lies the Rooftop (噴水広場・上層 Funsui Hiroba Jōsō, lit. "Fountain Square: Upper Level").
-
 Rooftop

The stairs in the lower left corner of the Fountain Square lead to the 1st District (1番街 1-Ban Machi, lit. "1st Avenue").
-
 1st District

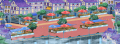
Following the stairs on the right side of the Fountain Square the 2nd District (2番街 2-Ban Machi, lit. "2nd Avenue") can be reached.
-
 2nd District
 -
 The 2nd District after hitting the waterway switch.

_KHX.png)
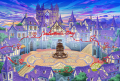
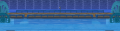
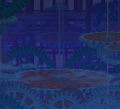
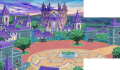
Somewhere beyond the 2nd District lies the Clock Tower Area (時計塔・周辺 Tokei-tō Shūhen, lit. "Clock Tower and Surroundings").
-
 Clock Tower Area
Leaving through the large left gate of the Clock Tower Area leads to the Seventh District (7番街 7-Ban Machi, lit. "7th Avenue").
-
 Seventh District
 -
 The Seventh District during Nightmare Chirithy's assault.

_KHX.png)
On the left side of the Seventh District is a door to the Seventh District: Vacant House (7番街・空家 7-Ban Machi Akiya, lit. "7th Avenue: Vacant House").
-
 Seventh District: Vacant House

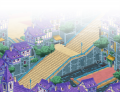
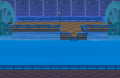
Leaving the Fountain Square through the large gate on the left leads to Market (中央市場 Chūōshijō, lit. "Central Market").
-
 Market
In the middle of the Market a door to the Warehouse (中央市場・倉庫 Chūōshijō Sōko, lit. "Central Market: Warehouse") can be found.
-
 Warehouse

The gate on the left side of the Market connects to the Avenue (郊外へ続く橋 Kōgai e Tsudzuku Hashi, lit. "Bridge to the Suburbs").
-
 Avenue

Crossing the bridge to the left leads to the Boardwalk (海沿いの遊歩道 Umizoi no Yūhodō, lit. "Boardwalk along the Sea").
-
 Boardwalk

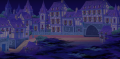
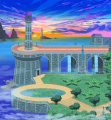
The Boardwalk has two exits to the Waterfront Park (臨海公園 Rinkai Kōen): on the upper left over the bridge, and the lower left through the park.
-
 Waterfront Park

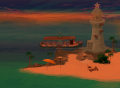
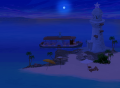
The Waterfront Park: Office (臨海公園・管理人室 Rinkai Kōen Kanrininshitsu, lit. "Waterfront Park: Manager's Office") can be found by entering the lighthouse in the Waterfront Park.
-
 Waterfront Park: Office

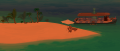
The bottom left door of the Waterfront Park: Office leads to the Waterfront Park: Dock (臨海公園・船着き場 Rinkai Kōen Funatsukiba).
-
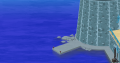 Waterfront Park: Dock
 -
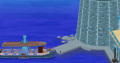 The Waterfront Park: Dock with a ferry ready to leave.

_KHX.png)
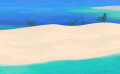
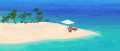
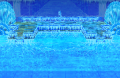
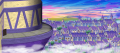
Taking the ferry from the Waterfront Park: Dock, the Beach (島のビーチ Shima no Bīchi, lit. "Island Beach") can be reached, which consists of four areas. A dusk and night version of Beach can be visited during the Summer Adventure event.
-
 Beach A
 -
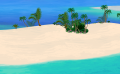 Beach B
 -
 Beach C
 -
 Beach D

_KHX.png)
_KHX.png)
_KHX.png)
-
 Beach A at sunset
 -
 Beach B at sunset
 -
 Beach C at sunset
 -
 Beach D at sunset
_KHX.png)
_(2)_KHX.png)
_(3)_KHX.png)
_(4)_KHX.png)
-
 Beach A at night
 -
 Beach B at night
 -
 Beach C at night
 -
 Beach D at night
_KHX.png)
_(2)_KHX.png)
_(3)_KHX.png)
_(4)_KHX.png)
During the Summer Adventure event, taking a different ferry from the Beach would take you to a reef with shipwrecks.
-
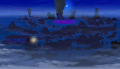 Shipwreck Shore
 -
 The Shipwreck Shore during the day.

_KHX.png)
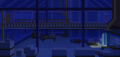
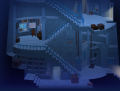
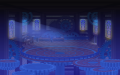
Entering the sewers in the 2nd District or going down the steps in the Waterfront Park: Office leads to the Underground Waterway Entrance (地下水路・入口 Chika Suiro Iriguchi), and subsequentially to the Underground Waterway (地下水路 Chika Suiro), which connects both areas and the Clock Tower: Underground Entrance (時計塔・地下入口 Tokei-tō Chika Iriguchi). Counting entries and exits, the Underground Waterway consists of ten areas.
-
 Underground Waterway F
 -
 Underground Waterway E
 -
 Underground Waterway D
 -
 Underground Waterway C
 -
 Underground Waterway Entrance
 -
 Underground Waterway A (1)
 -
Underground Waterway A (2)
-
Underground Waterway A (3)
-
 Underground Waterway B
 -
 Clock Tower: Underground Entrance
_KHX.png)
_KHX.png)
_KHX.png)
- Draining the water during the Shark Hunt creates a lower passage that connects the first four areas of the Underground Waterway.
-
 Underground Waterway F
 -
 Underground Waterway E
 -
 Underground Waterway D
 -
 Underground Waterway C
_KHX.png)
_KHX.png)
_KHX.png)
_KHX.png)
- During the Christmas Winter Party Event!, three areas are frozen.
-
 Underground Waterway D
 -
 Underground Waterway C
 -
 Underground Waterway E
_KHX.png)
_KHX.png)
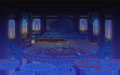
Going up the stairs in the Clock Tower: Underground Entrance leads to the Clock Tower: Level (時計塔内部 Tokei-tō Naibu, lit. "Clock Tower Interior"), which consists of a labyrinth of five different areas.
-
 Clock Tower: Level A
 -
 Clock Tower: Level B
 -
 Clock Tower: Level C
 -
 Clock Tower: Level D
 -
 Clock Tower: Level E
_KHX.png)
In some quests, exterior areas can be reached through some Clock Tower: Level exits.
-
 Clock Tower: Exterior A
 -
 Clock Tower: Exterior B

_KHX.png)
Some areas of the the Clock Tower: Level C variant contain the Clock Tower: Elevator (時計塔・エレベーター Tokei-tō Erebētā).
-
 Clock Tower: Elevator

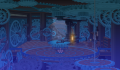
Moving up with the elevator leads to the Foretellers' Chambers (予知者の部屋 Yochi-sha no Heya).
-
 Foretellers' Chambers
 -
 The Foretellers' Chambers during the fight with Darkness.

_KHX.png)
Another elevator moves up to the Clock Tower: Control Room Hall (時計塔・管理室前 Tokei-tō Kanri Shitsumae, lit. "Clock Tower: In Front of the Control Room").
-
 Clock Tower: Control Room Hall

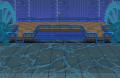
At the bottom of the Clock Tower lies The Basement (箱舟の間 Hakobune no Ma, lit. "Ark Room"), which contains the lifeboat.
-
 The Basement

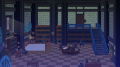
Somewhere in Daybreak Town a hall with fourteen adjoining rooms can be found.
-
 Unknown room
There is a graveyard somewhere beyond the city area of Daybreak Town.
-
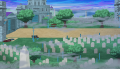 Graveyard A
 -
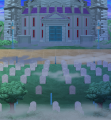 Graveyard B
 -
 Graveyard C

_KHX.png)
_KHX.png)
The Corridor of Darkness (闇の回廊 Yami no Kairō) can be accessed at the Fountain Square during the Dark Corridor Trials, the Warehouse when visiting Enchanted Dominion for the first time, and Shipwreck Shore during the Summer Adventure event.
-
 Corridor of Darkness A
 -
 Corridor of Darkness B
 -
 Corridor of Darkness C
 -
 Corridor of Darkness D
 -
 Corridor of Darkness E
 -
 Corridor of Darkness F
_KHX.png)
_KHX.png)
Cutscene maps
[edit]-
 The Player's room
 -
 Strelitzia's room
 -
 A park overlooking the town.
 -
 The hills
 -
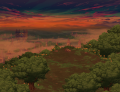 The hills during sunset.
 -
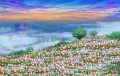 The flower meadow
 -
 The Control Room
 -
 The corridor before Ventus's chamber.
 -
 The chamber where Ventus was recovering.
 -
 The corridor before The Basement.


_KHX.png)


